Instructions: Create form with table functions
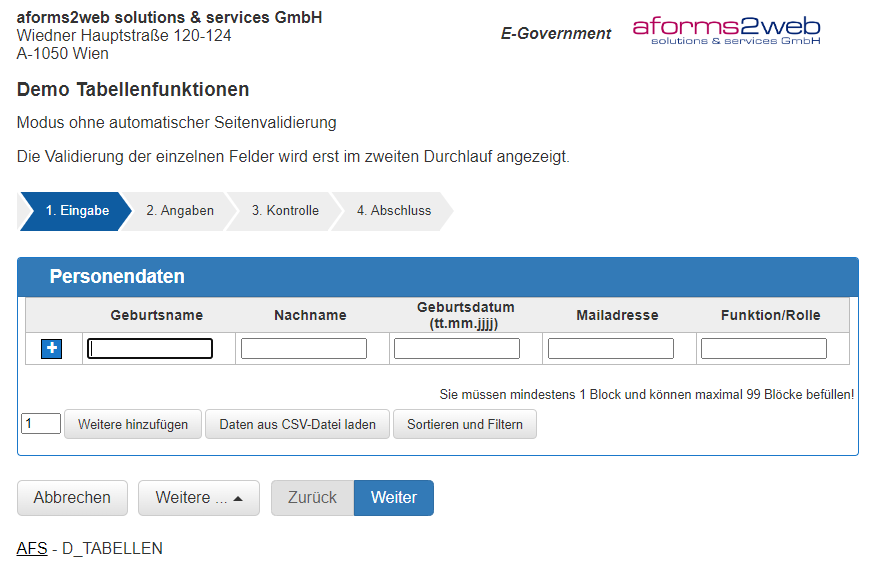
For entering a number of similar data records, such as people in a household or booking lines of an expense report, AFS offers repeatable form elements. AFS form pages and blocks can be added and deleted dynamically. Tables are a particularly structured way of displaying repeatable elements.
In the table view, repeated blocks are displayed in rows of the table. The field labels become column headings. Table rows can be added and deleted dynamically. Row contents can be specified as unchangeable or fillable.
AFS table contents can also be calculated automatically and even imported from CSV files. This function is particularly suitable for importing mass data that is already available to the user in electronic form. AFS tables have a scrolling mechanism (paging) so that even large amounts of data can be conveniently displayed.
In the example shown, you can test table functions such as expanding and collapsing, sorting and/or filtering, as well as importing data from a CSV file.
You can find a sample file here to test the CSV import: Test data"
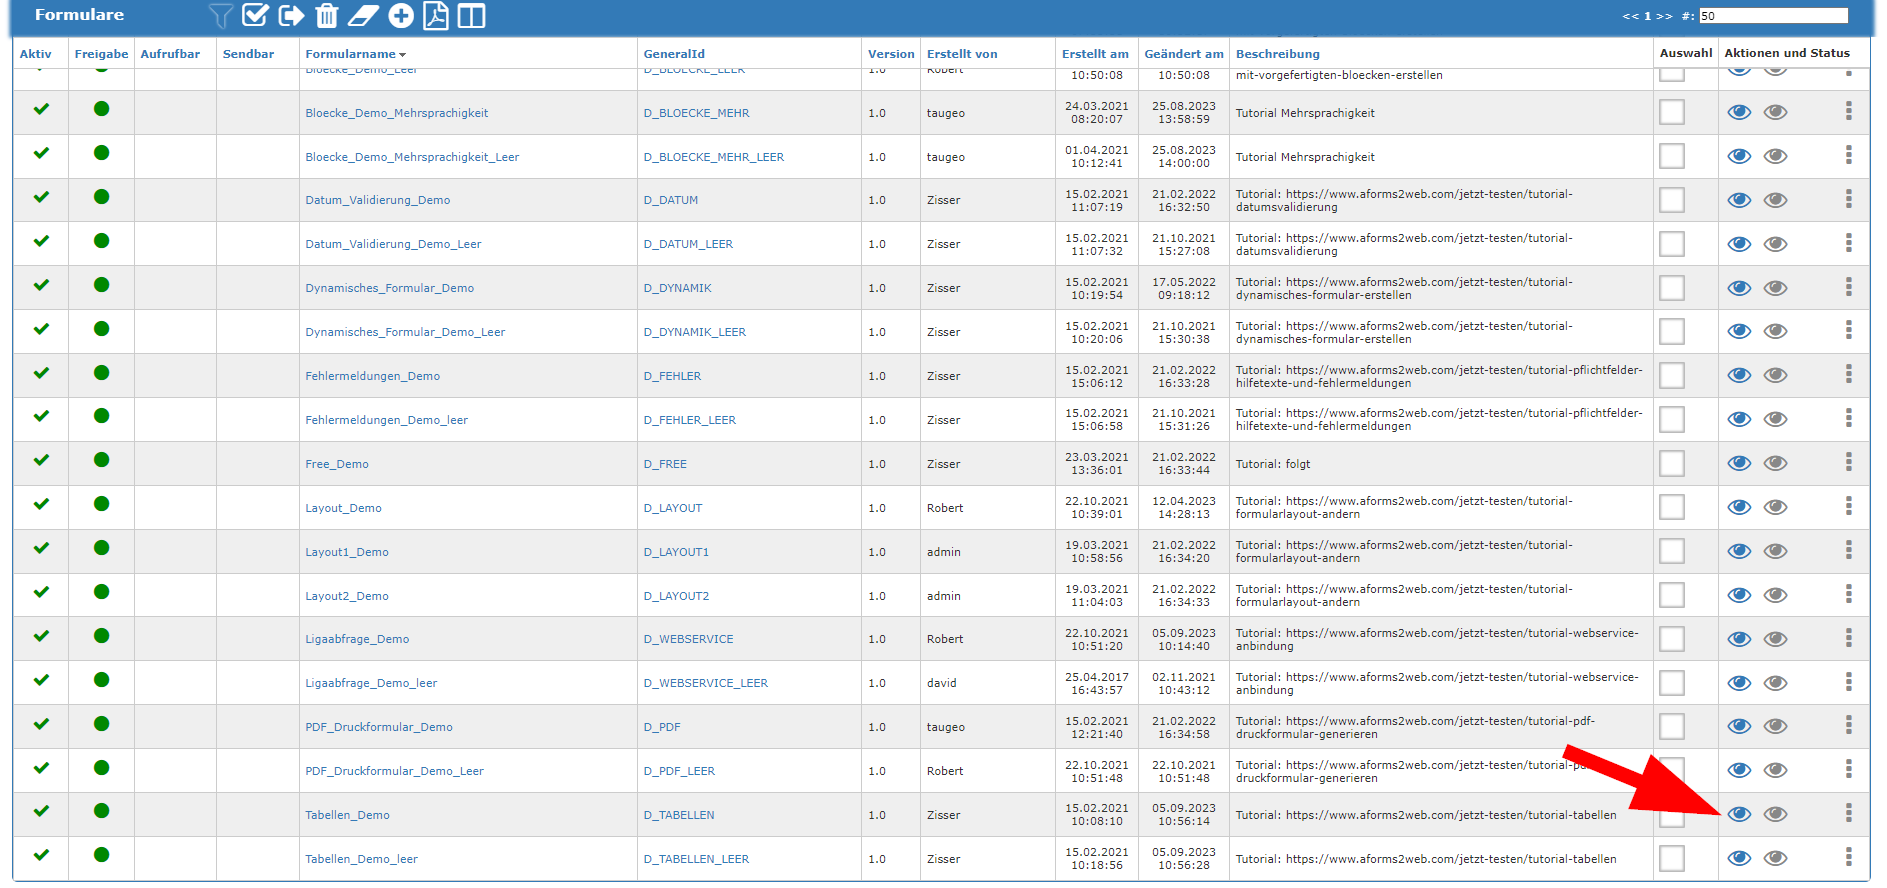
Step 2: Select form:
The current example is the "Table_Demo_Blank" form, which contains a table but no functions such as sorting, filtering and expanding and collapsing.
Step 3: Activate table functions
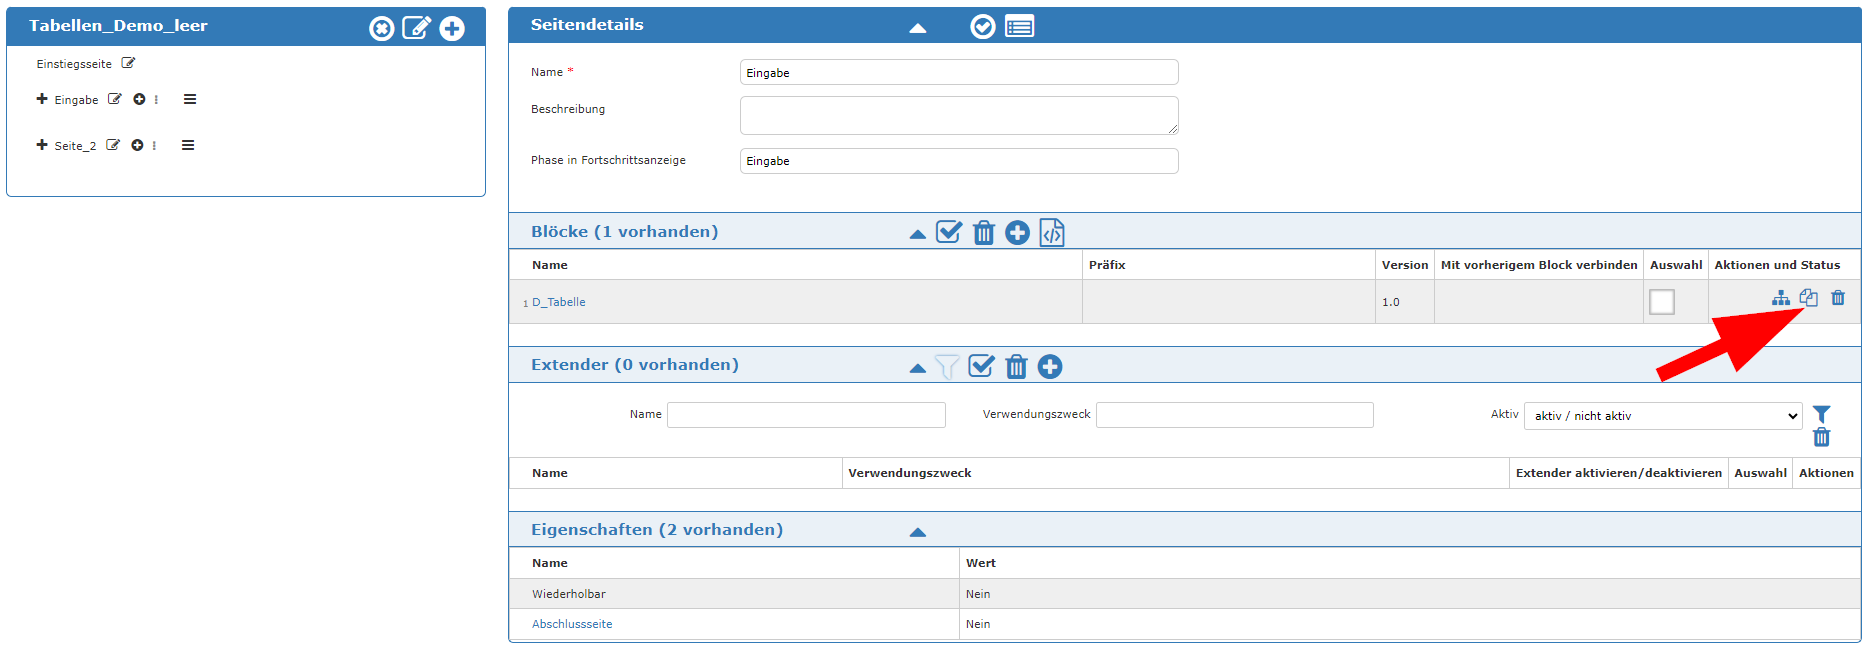
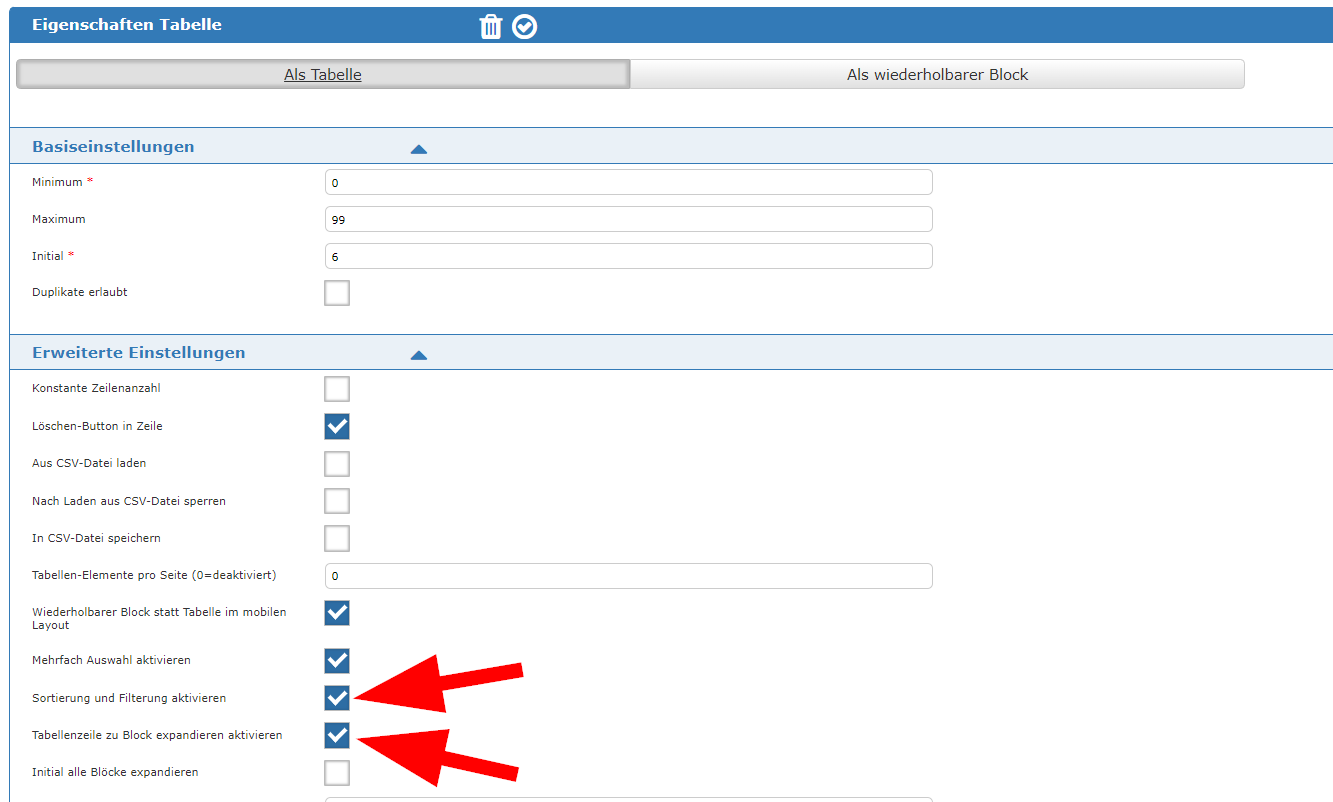
Now click on "Input" at the bottom of the "Form pages" area to call up and edit this page Then click on the "Edit block repetition" editing icon at the top of the "Blocks" area to the right of the "D_Table" form block. Here in the "Advanced settings" area, tick the checkboxes "Activate sorting and filtering" and "Activate expand table row to block" and can optionally define which fields should be expanded or collapsed further down in the "Table properties" area.
Step 4: Finished form
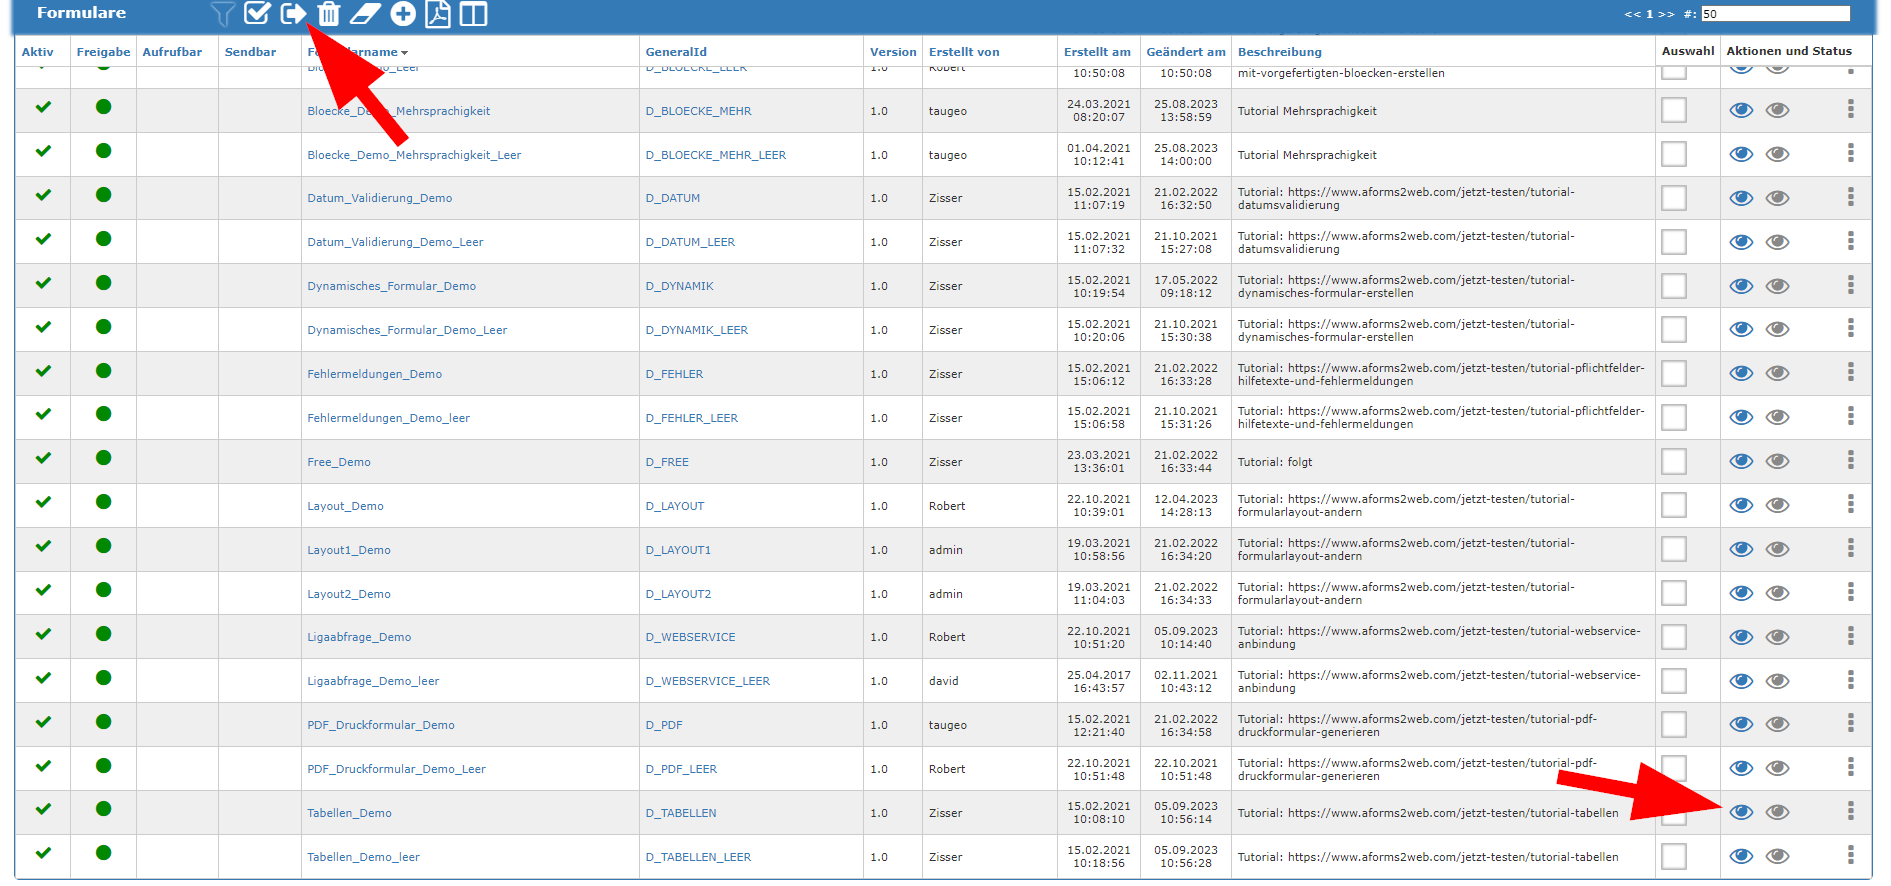
Finally, click on the Apply icon at the top to save the set table properties. Back in the page details, click on the Apply icon again to return to the editing interface of the form. Here you click on the save icon and you are in the form overview of your form collection. In order for the changes you have made to be synchronized with the form server and take effect in your form, you must click on the synchronization icon and can then open the preview by clicking on the first preview icon to the far right of the form name "Tabellen_Demo_Leer".

