Instructions: Create PDF print forms
AFS forms can also be offered simply as a PDF print form. The form, including all previous entries, is created in a PDF file and can therefore be used immediately as a paper form. You can also simply add a header and signature block so that the form is also immediately available as a valid document.
The example shown shows you how easy it is to offer an online form as a PDF print form.
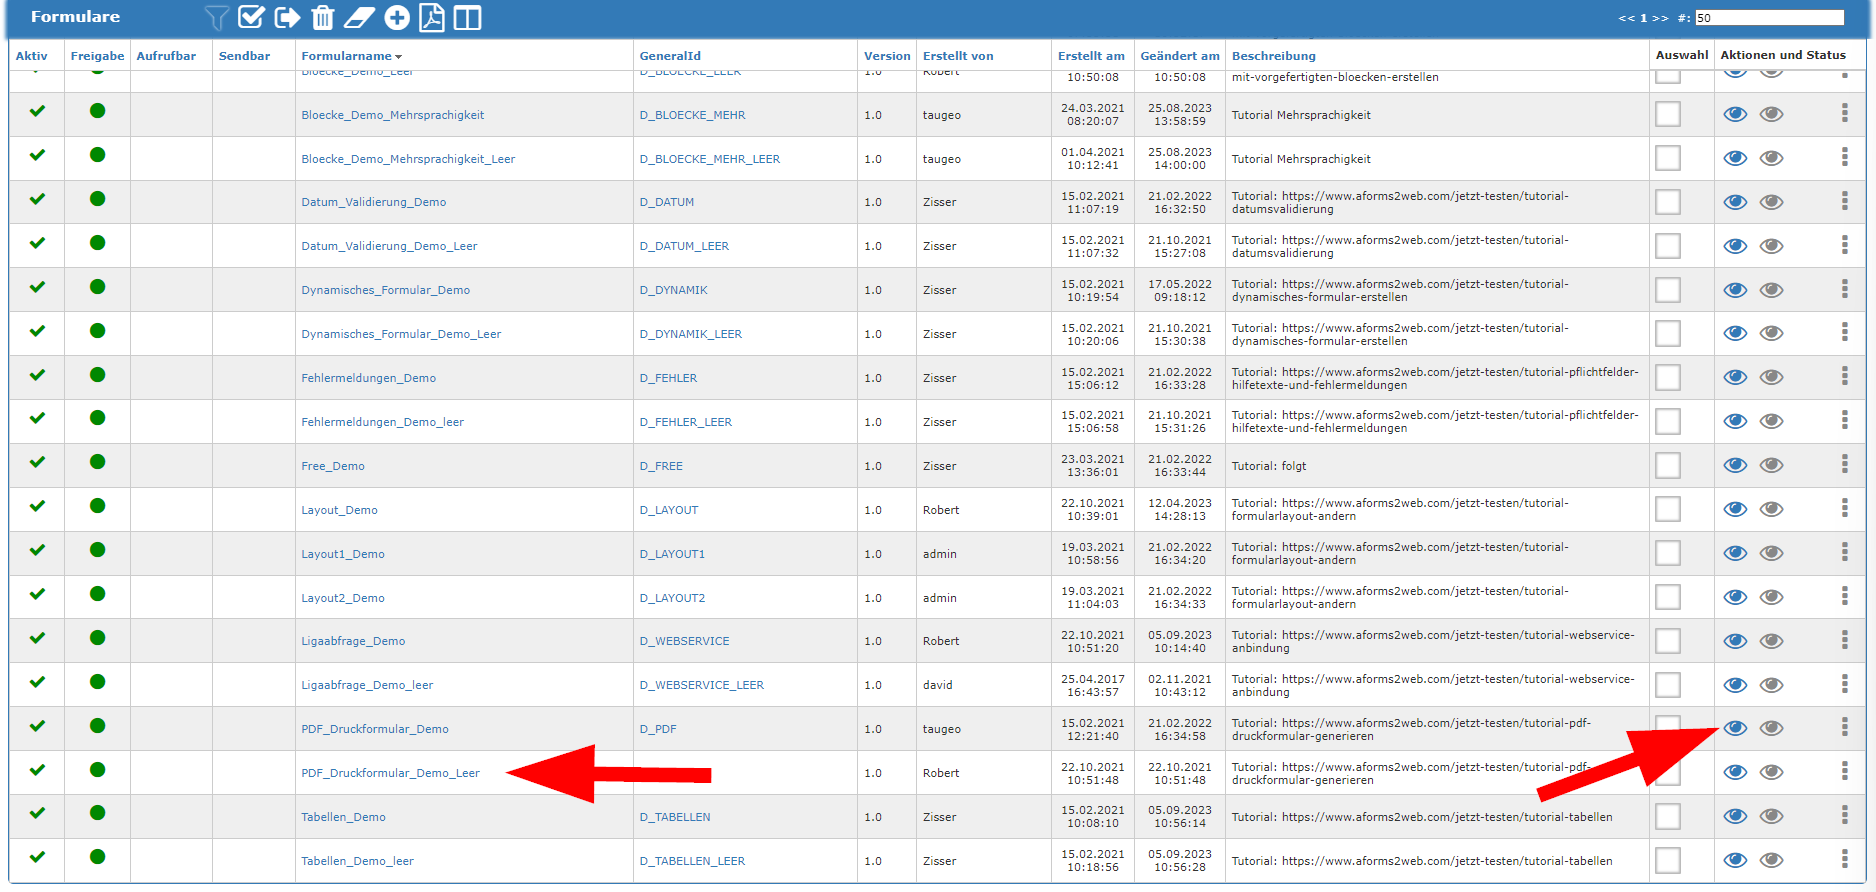
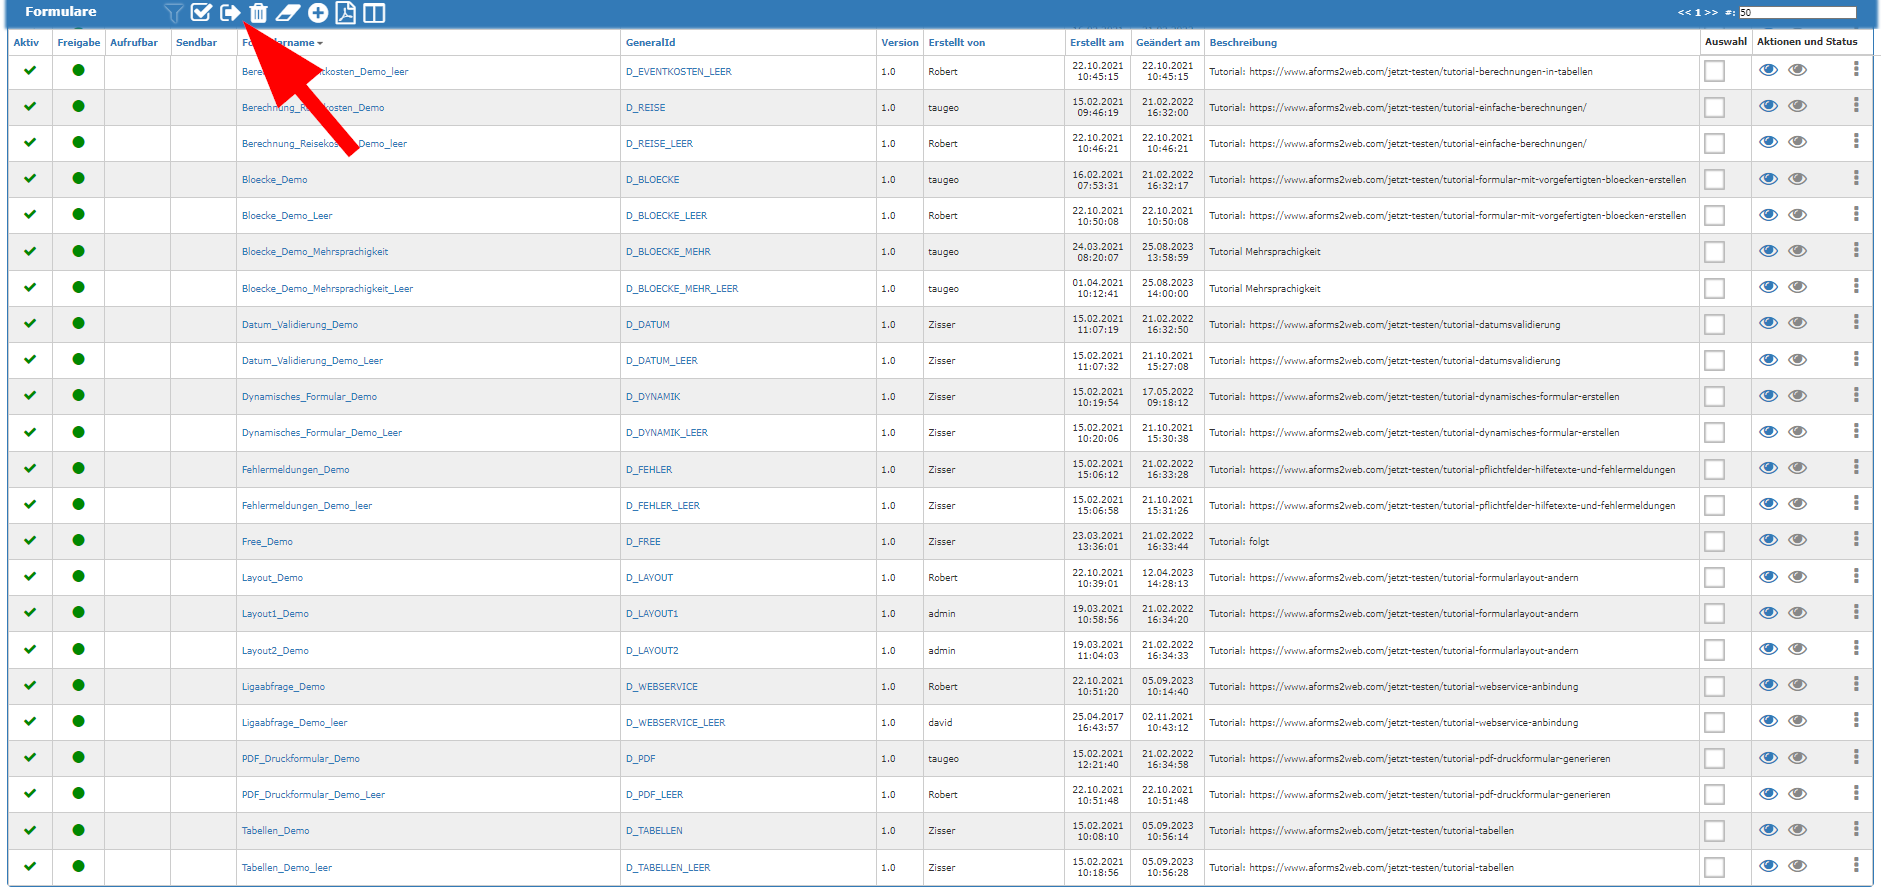
Step 2: Select form:
In the current example, the form is "PDF_Printform_Demo_Blank", which should also be available as a PDF form. You can view the finished form using the "Preview" button on the right in the line of the form.
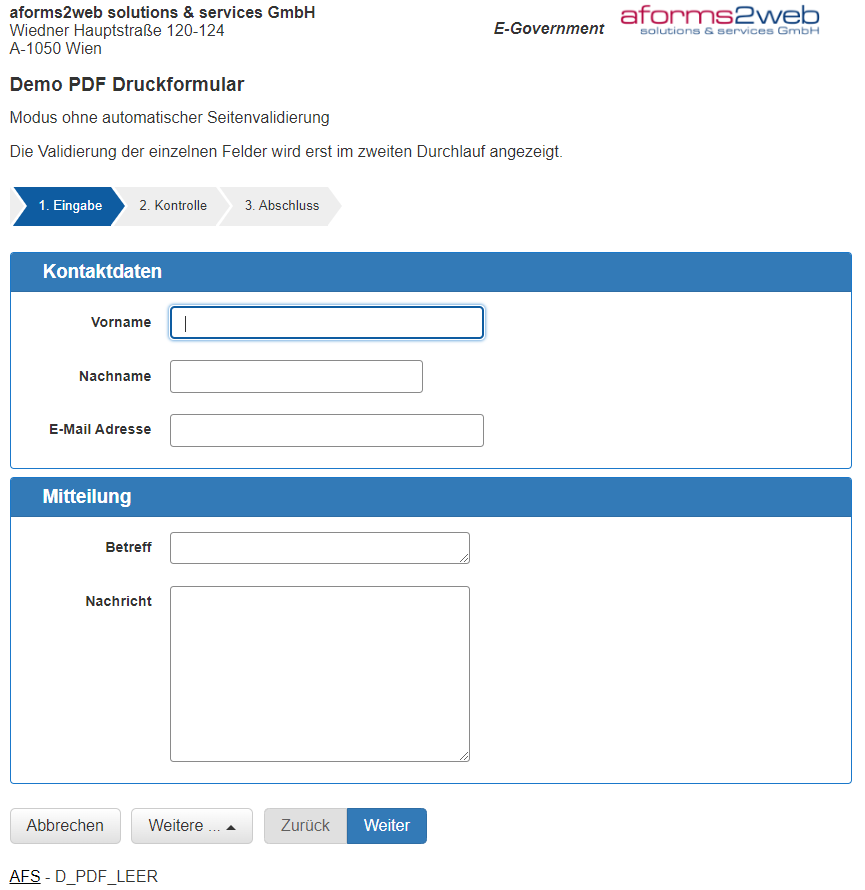
Figure 3: Preview of the "PDF_Druckformular_Demo_Leer" form, which is only available as an online form.
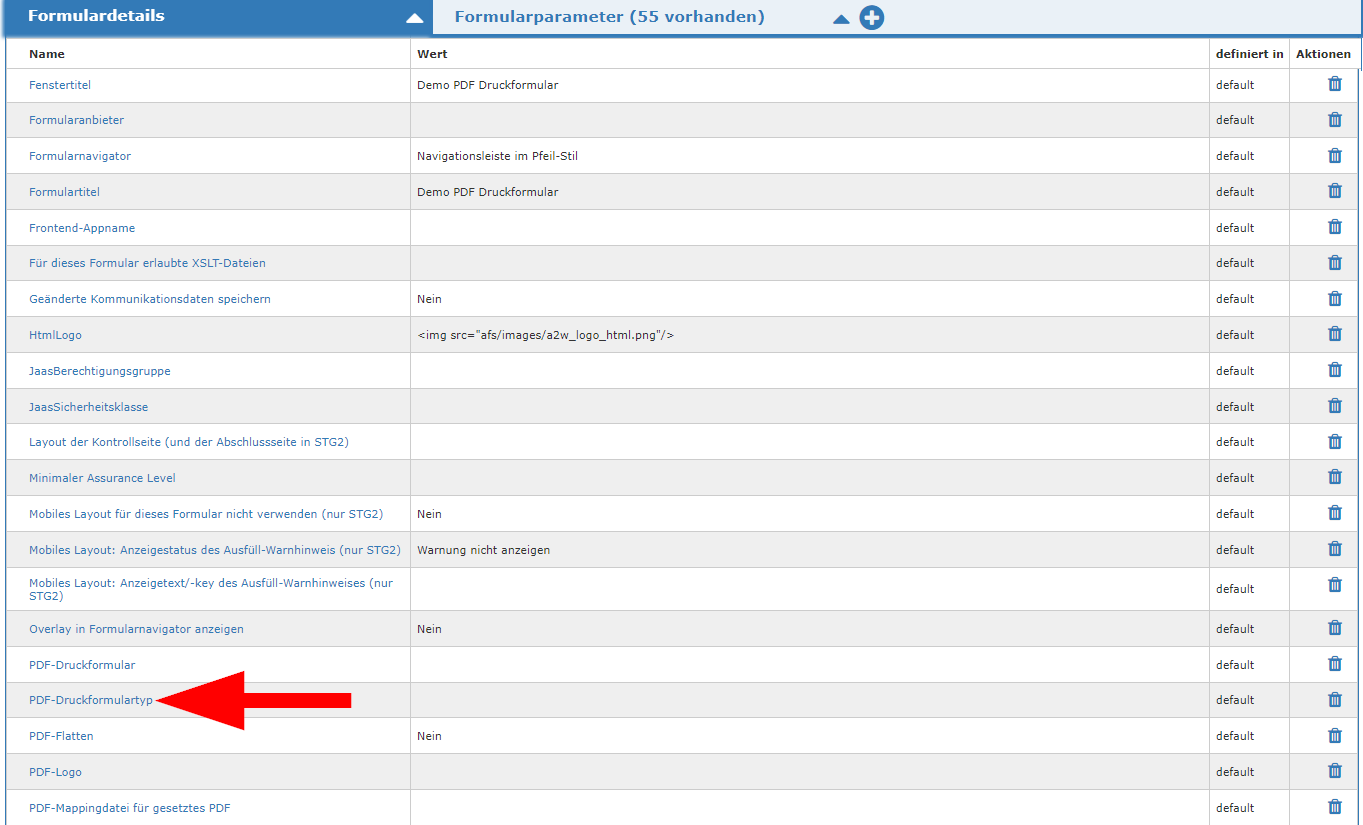
Step 3: Select PDF layout:
Under "Form parameters", click on "PDF print form type" and then select "Blank form layout" from the drop-down list.
In the "Form details" view, create a new form parameter and name it "show_print_prefill" and give it the value "true". Now click on the Apply icon and then on the Save icon under "Form details". We use this parameter to show the "PDF view" button in the form.
Step 4: Add a customized header and logo:
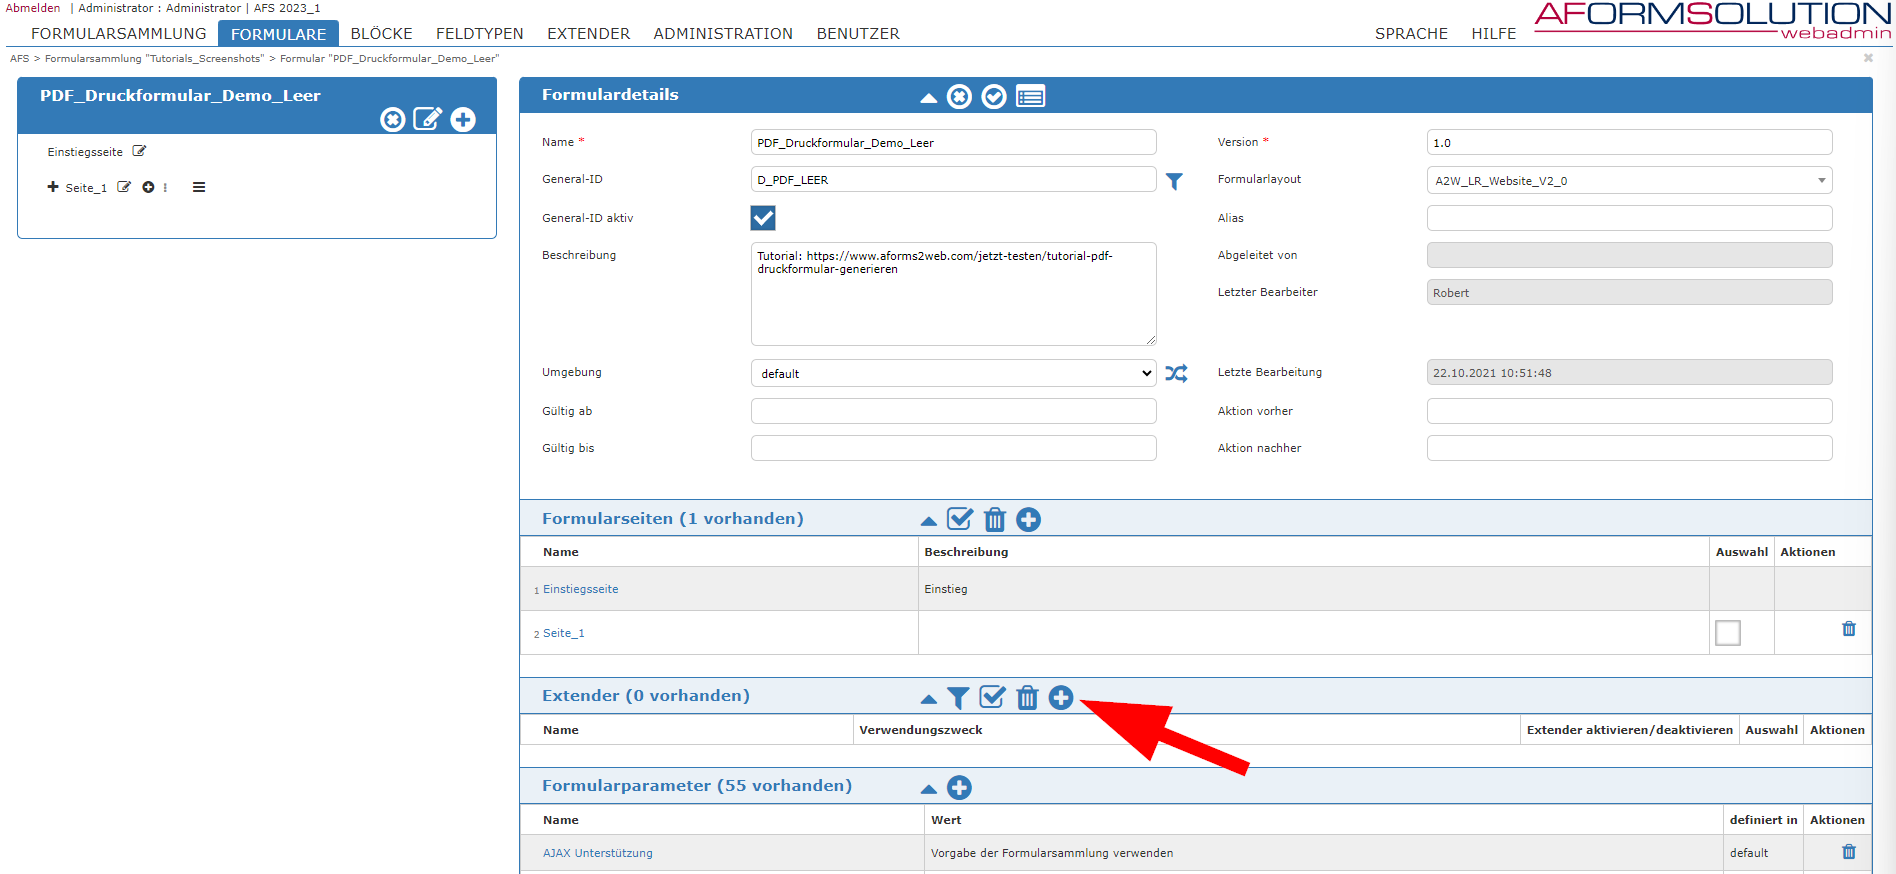
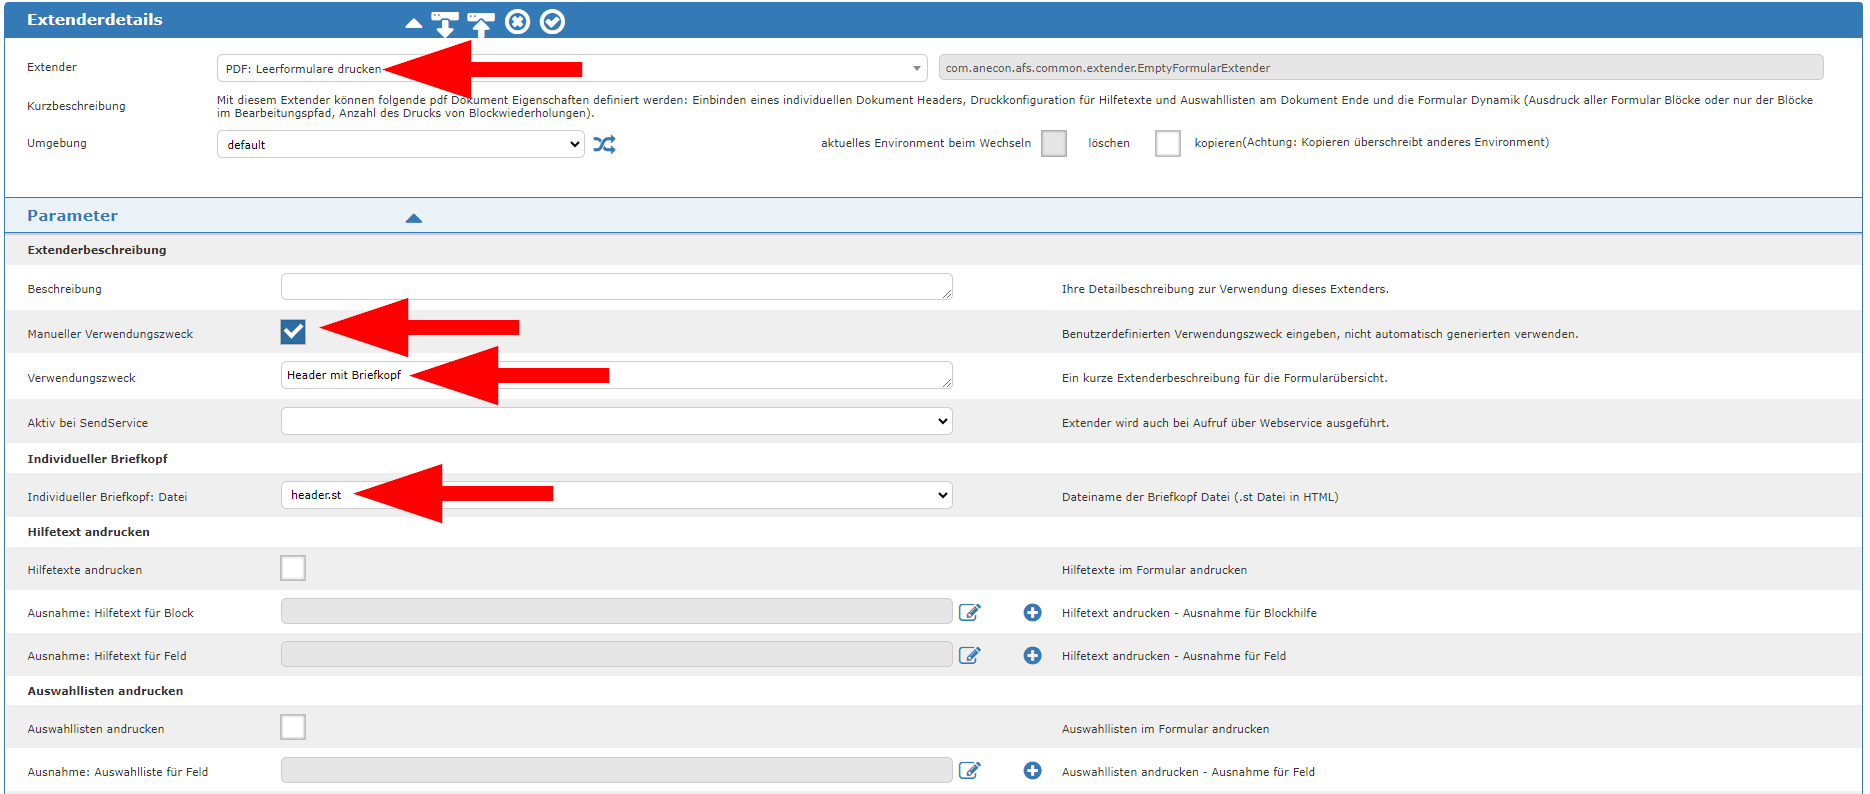
You can use AFS to customize your header in the PDF form and also add logos. To add the letterhead to the file, we need a so-called extender. To do this, scroll to "Extender" on the "Form details" page and click on the add icon. Select the extender "PDF: Print blank forms" extender from the drop-down list and select the "header.st" file under "Individual letterhead" and click on the Apply icon. This is a.st file that we have created for demo purposes.
You can use AFS to customize your header in the PDF form and also add logos. To do this, go to the "Form details" page under "Form parameters", select "PDF logo" and enter the following path to our demo logo: "afs/images/Marketing_layoutlogo.png" and click on the Apply icon.
Step 5: Add signature block:
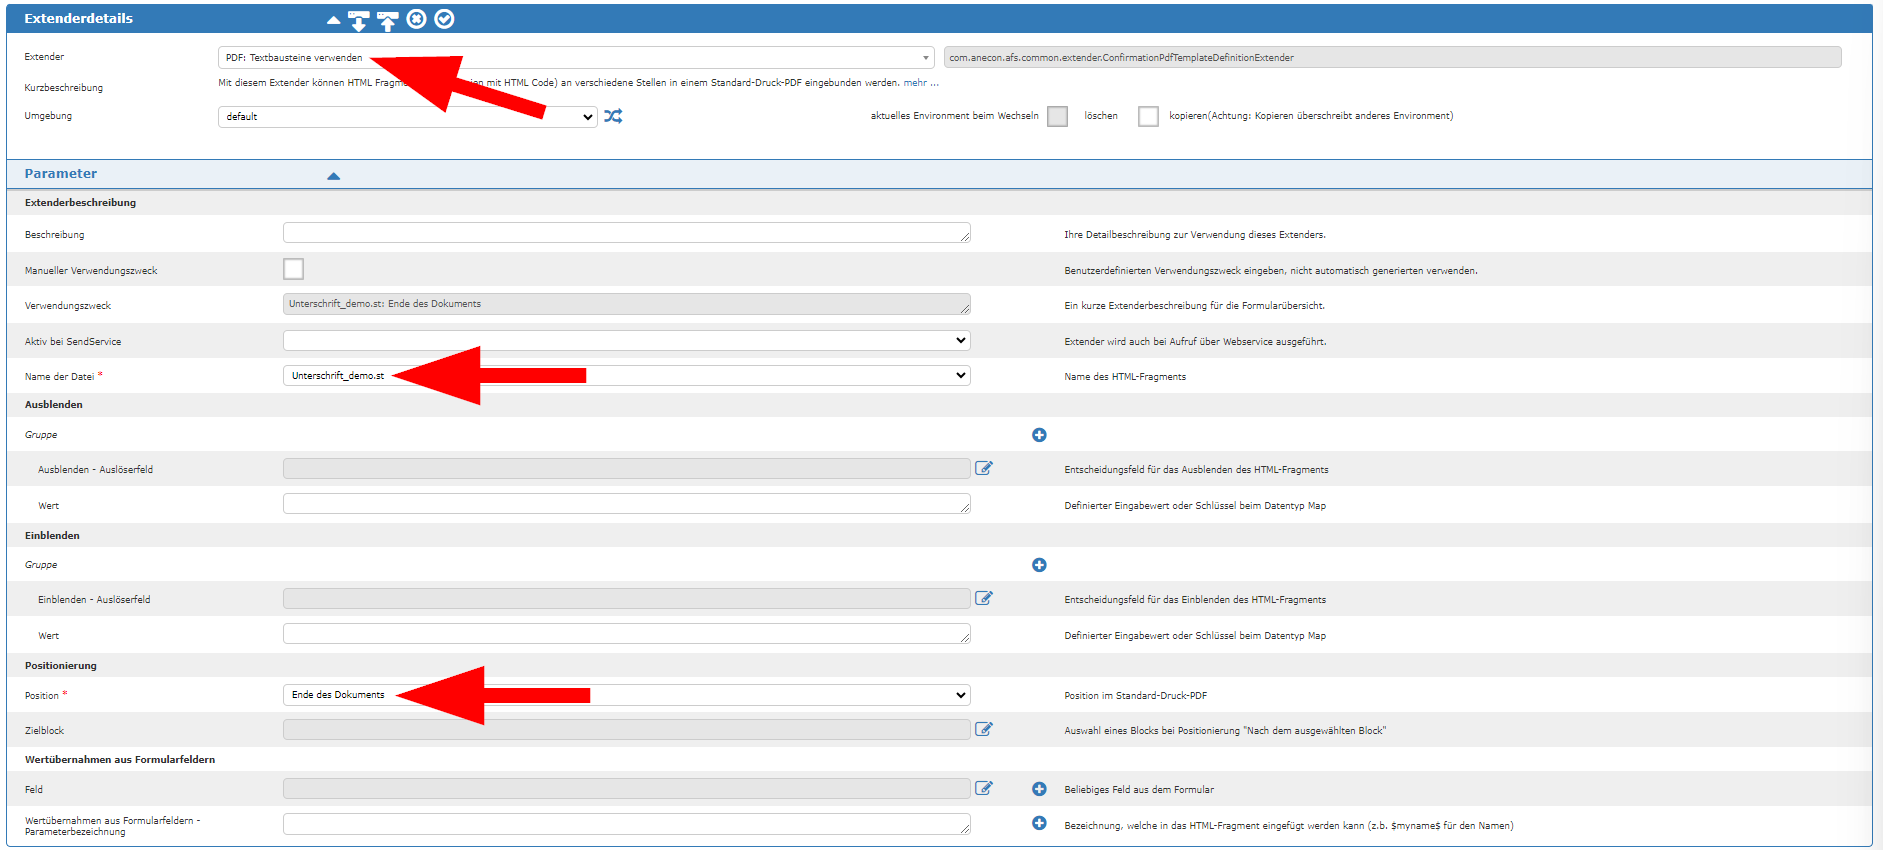
Now add a signature block by selecting the extender "PDF: Use text blocks" extender as before "PDF: Print blank forms" extender. Now select "Signature_demo.st" under "Name of file". Then select under "Position" where the signature block should be displayed in the PDF file. In our case, "End of the document".
Step 6: Finished form:
After you have clicked on the Apply icon again and then on the Save icon, you are back in the form overview. Click on the synchronize icon to synchronize the changes with the server. Then click on the preview icon next to the "PDF_Print_Form_Demo_Blank" form again to open the form.

